
Even beginners can create various designs in a pottery workshop using hand-building!
"I'd love to make pottery, but I don't know where to start."
"I've never been to a pottery class, and I feel a bit nervous."
"I want to try it, but am I skilled enough?"
If you feel this way, please rest assured.Pottery is an art form that can bring infinite ideas to life. Let's freely create pieces using pottery, one of the oldest and simplest techniques.
In this article, we will explain what the hand-building technique is.
We will also introduce the most basic tools needed to complete your work.
What kind of technique is hand-building?
There are various methods for forming clay in the world of pottery, with hand-building and the electric potter's wheel being the most popular.
Hand-building is a method of shaping clay using the strength of your hands. The name literally means "working with hands," and while you can use other tools, you don't use an electric wheel.
This technique is also called "kneading by hand," which also implies "making with hands."
Hand-building is easy to start; simply take clay in your hands and use your fingers to form a specific shape. You can slap the clay against a table to create flat sections, or use the palm of your hand to roll it into a ball. You can squeeze, stretch, or poke holes in the clay with your fingers—there are so many possibilities.
Do you remember playing with clay in the past, rolling it freely in your hands to make your favorite shapes, or just enjoying the feel of the earth?
That is exactly what hand-building is.
Because it doesn't require prior knowledge of how to use tools, it is the most fundamental way to start pottery. Hand-building is a technique where you can feel the texture and temperature of the clay, and experience how the shape changes as you stretch and mold it.
Therefore, it is important to first use hand-building to get a feel for the nature of the clay, to understand its stickiness and texture, and to see how it reacts to the movements of your own hands.


There are two basic motions in this technique.
In this article, we will introduce two simple and easy-to-learn methods so you can practice them in your first pottery class.
Pinch Potting. How to make a basic mug
Pinch potting is a technique where your fingers take center stage. Start with a ball of clay, open a hole in the center, and narrow the walls of the ball to create the shape of a mug.
For practicing pinch potting, we recommend using a hand-operated potter's wheel. Place the ball in the center of the wheel, and open a hole until the clay at the bottom—which will become the base of the mug—is about 1 centimeter thick. Then, while turning the hand wheel, apply pressure to the walls of the vessel to ensure a uniform thickness throughout. You should work carefully so that the thickness of the vessel remains consistent.


Once the clay dries a little, you can make a coil from other clay and attach it to the outer wall of the vessel.
You can use a sponge, or slightly dampen your fingers and gently slide them over the clay,
polishing out any rough spots to smooth the rim of your piece.

Coil Building. A common hand-building technique.
Coil building is popular with everyone from beginners to advanced students.
It allows for various shapes, the method is very simple, and it does not require many tools or a lot of experience.
Usually, coil building is used when making tea bowls, cups, or round vases.
Since tableware and vases are items in our daily lives, knowing the steps will be useful knowledge if you want to make something like a vase in the future.
To make a tea bowl, start with a ball of clay the size of a golf ball, place it in the center of the wheel, and gently smooth it out to create the base for the bowl.


Next, using both hands, roll the clay between your palms and the table to make a "mud stick" (like the classic Spanish snack, churros!). Be careful, as pressing too hard will flatten the clay against the table and it won't roll.

Place the clay churro on top of the clay base you shaped on the center of the wheel, circling the edge like a biscuit. Press the clay from both sides with your fingers to join them together.


Slowly squeeze to thin out the coil and start forming the walls of your piece. This exercise helps you realize how much force you are using in each pinch. It is a very interesting exercise that helps you connect with your body and focus deeply. Press too hard and a hole will open; don't press enough and it won't stick.
Find the perfect balance between your fingers and the clay while adjusting your pressure.

Add another coil and repeat until you reach your desired height.
You can level off the mouth by cutting away excess clay with a cutter. If you want to smooth out the mouth or walls, use a damp sponge or wet your fingers and press them against the area you want to polish.

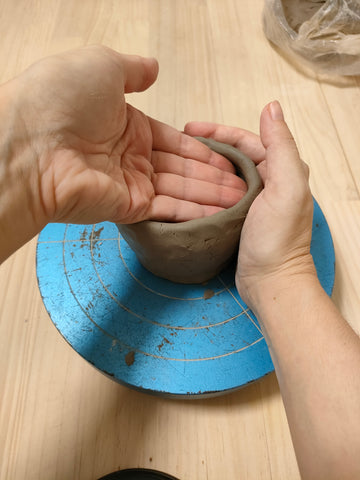


The thickness and length of the coils will change depending on the size of the piece.
It is important to practice and get to know the clay and your own hands.
How are hand-building and the electric wheel different?
With the hand-building technique, you aren't restricted by the rotation of the wheel, so you can shape the clay more freely. While it is possible to modify pieces after working on an electric wheel, it is not recommended for creating complex shapes.
Furthermore, with hand-building, you can add details and decorations while forming, whereas with an electric wheel, you must wait 1-2 days to start modifications or decorations because so much water is used in the forming process, meaning the piece takes a long time to dry.
Even if you use a hand-operated wheel when working with hand-building techniques, it won't be considered as anything other than hand-building. This is because the fundamental method is hand-building, and the hand wheel is only used to polish the work uniformly.
The major difference between hand-building and an electric wheel is the amount of experience required to get good results. Mastering a potter's wheel requires hours of training to gain control, but the steps for hand-building can be started by anyone, even someone who has never touched clay before. Simply changing the shape with your fingers is already the start of hand-building. You can intuitively create a variety of designs.

The electric wheel is a wonderful machine for quickly making pieces of similar size. With the hand-building method, it takes time, and it is impossible to make two completely identical pieces.
However, this handmade feel is exactly what makes the fun of hand-building, where you can enjoy the one-of-a-kind uniqueness of your work.
When you make something by hand, every time you use or look at it, you can remember the moment you made it and see the traces of your effort.
Both hand-building and the electric wheel are very interesting methods that give you infinite possibilities for realizing your designs.
This time, we focused on the merits of "hand-building." Another time, I would like to talk more about the electric wheel and its characteristics.
Hand-building designs for beginners
The most important thing when starting a design is to choose a shape you like or a design you think you'll enjoy. While you are making it, you might find a shape you like better, or encounter parts of the design that are difficult, and the final result might end up looking a little different. But if you start with an idea that excites you, you will surely learn a lot during the creative process.
This time, I would like to suggest three designs from the Pottery Tocoton catalog. All three were created using hand-building techniques. You can use these as examples to start practicing, or add your own touches by changing shapes or adding decorations.
Recommendation #1 for hand-building design: Haniwa
One of the most popular items in our online shop is the Haniwa. You can display it in your home, use it to hold rings, or bury it halfway next to a plant so it can "hang out" with your greenery.

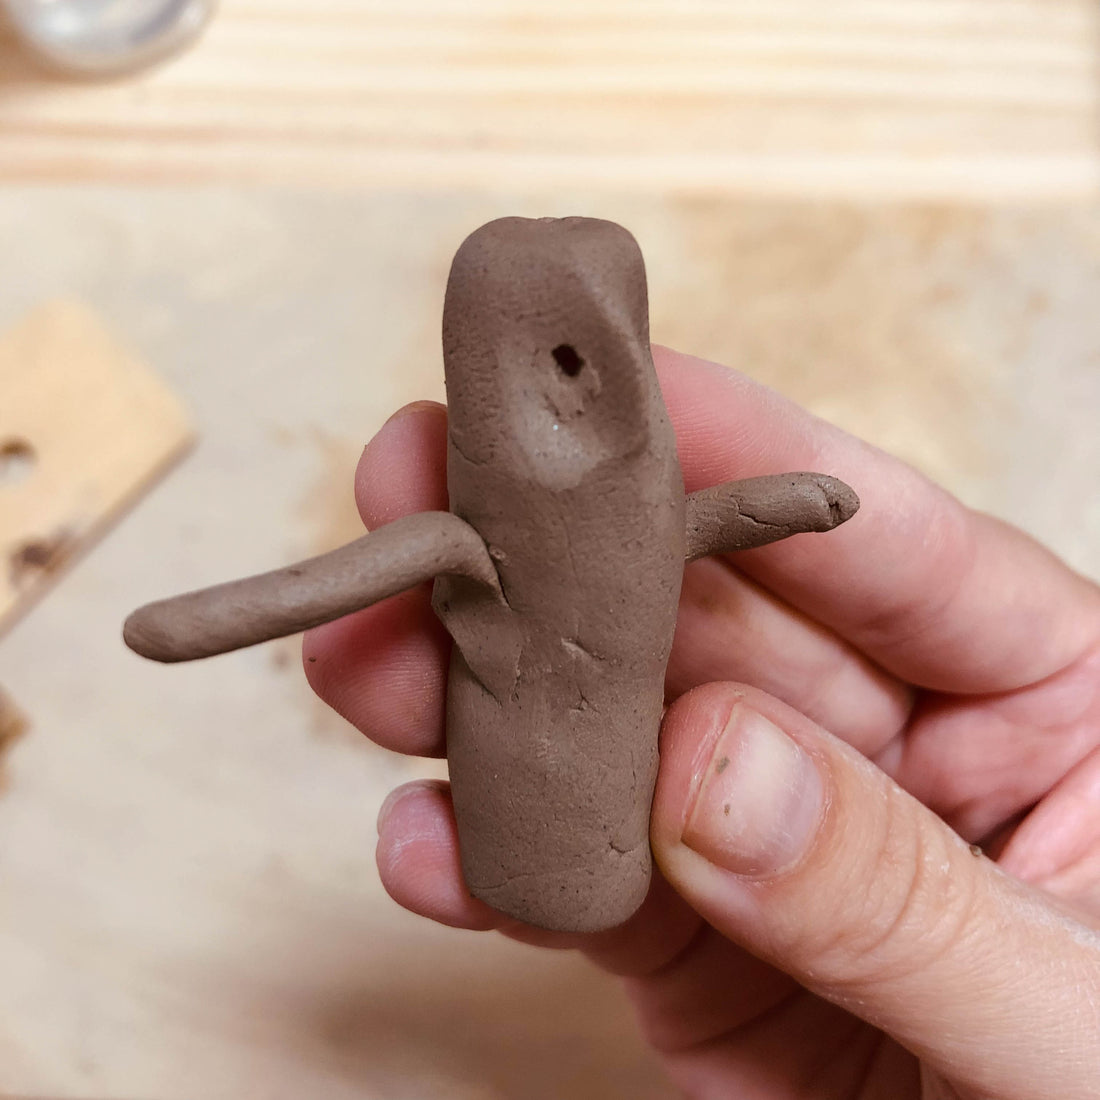
While the steps to make a Haniwa are always the same, the facial expressions and decorations are each unique. The main body is made of short coils, and a hole is made in the bottom to serve as a stand for the figure.
The arms are two short, thin coils attached to the Haniwa's torso, and there is a nose and other decorations. For the eyes, L'artesanna used a tool to punch holes. It's fun to shape the head and the movement of the arms with your fingers.


As you can see, you can create completely different, unique pieces using the same process.
Recommendation #2 for hand-building design: Vase
This piece was created using the "coil building" technique. L'artesanna stacked the churro-like coils one by one, pressing them firm to build the walls of the vase. For the upper part, the coils were flattened horizontally, extending outward from the body to create a wide mouth.

Using tools, the surface was polished, and cobalt and matte enamel were used for decoration.
This design is not overly complex, but the difficulty lies in making something this tall without the walls deforming. It's a good practice for understanding the right amount of pressure to use when squeezing the clay.
Recommendation #3 for hand-building design: Paperweight
This piece is very easy to make, and its beauty lies in its simplicity and the way you can see the texture of the soil after firing.

To make this, we used white clay, rolling it on the table until it reached the desired shape. We smoothed the bottom with our fingers so the fired clay wouldn't scratch the surface. We also polished the top slightly, but kept the shape created by rolling the clay as it was.
After firing, this piece was polished with sandpaper to smooth the texture of the clay. No glaze was applied so that you can appreciate and touch the soil itself.
It's a simple task that even a beginner can do, resulting in an elegant yet unique piece—no two are exactly alike.
Conclusion
As you can see, all you need is clay, your hands, and a favorite design to get started in pottery with just a single technique and a little experience.
If you would like to try this technique, or want to try various other techniques, please don't hesitate to contact us. We are looking forward to your reservation for a pottery class at our studio!